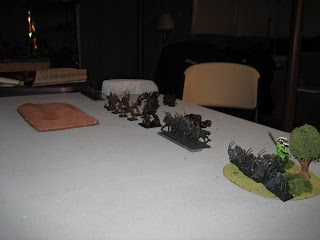
Two days passed, my army of Wood Elves met my friends Bretonnians on the field of battle. This battle just the next in a long line of clashes between them. In an effort to sort this rubbish into a meaningful end, we began a campaign. My forces marches, on the cuspe of their victories, into the land of Mousillon. There, in unfamiliar terrain with a lack of vegetation, the wood elves of Lord Hannibal managed a marginal victory and grew roots on Bretonnian lands.
This battle was a tough fight for my wood elves. Leadership saves did not pan out as well as I had hoped due to a few error: poor placement of Wild Riders netted them total annihilation; three warhawk rider positions are now open - apply within; the armor of the Brets proved nigh impossible to breach; my magic could have been more effective and less defensive - but who can rely on magic? Some of the incidents mentioned above just could not be helped due to dice rolls. I did manage to learn much more about my army in this marginal victory than any of my massacres.
My treeman did well to bother two of my opponents entire knight units; the peasants I counted on fleeing taking their fellows keeping the trebuchet warm did indeed go on holiday; while the glade riders did flee, twice from battle and three times in all, they were still counting and alive to contest and board corner; there are a few other things I took from this battle, but mainly are only of use against highly armored opponents like Bretonnians. Mousillon, we are here!
Below are just a few other "interesting" game pieces.

Who said we didn't play with any marshes or bogs this game? Above is an absolute mess of a fight that started at the start of turn two and lasted until the top of turn 6. First starting with the treeman, the focus in the center, and the Glade riders versus the Knights Errant (oriented above the treeman). The elven side won combat but failed to make the Errants flee, the Knights of the Realm then thought to join the melee and caused three wounds on the treeman, and won combat. The Glade riders fled, leaving the stubborn treeman to hold off two units of knights. Another elf turn passed with the dryads moving into position to charge the KotR's flank. The treeman continued to hold! The dryads (brown tree looking things) and my Lord (behind the Knights Errant) charged to the rescue. Alas the rescuing did not happen right away. The lord did carve up the Knights Errant with the help of the treeman, then charged into the KotR, to start the bog all over again. Dryads slowly dropped down to two left in the end, but the KotR were finally decimated in turn 6.

This is another angle of the battle mentioned above. If you look to the rear of the melee you see another knight unit (Grail knights) and they are in the upper right of this picture. They mercilessly charged my wardancers and the defense the wardancers provided was paramount and worth mentioning.
Having no other choice since the Grail Knights were charging, with a lord and palain in the mess, and facing two attacks each from 5 Grail knights, I had to activate my dancers Shadow Dance to permit them a half decent +4 ward save. This save was still facing a slew of strength 6 hits and any kind of losses would put my unit in danger of fleeing. Miraculously in about a total of 6-8 wounds, I only failed 1. With over 10 attacks back, some focused on the paladin BSB, he was slain but the fight was lost to my elves, who faced a leadership test. They passed a hard roll needing under a 6 I believe and held on a 4 or 5.
They would not be so lucky next round, lost more of their number and fled the battle, the misplaced Wildriders ate a new charge in the side and bought the farm. The wardancers, seeing the carnage caused by their failure upon their kin, rounded on the Lord leading the Grail Knights. In the final round they charged and struck the Lord down with three well placed blows!


No comments:
Post a Comment